“$find(‘…’) returns null” issue

I just happened to come across this issue when I was working on a project. I was trying to get a reference of the Telerik RadComboBox control in JS but Chrome kept complaining about this error – Uncaught TypeError: Cannot read property ‘get_items’ of null…

RadComboBox control

<telerik:RadComboBox runat="server" ID="myRadComboBox" />

JS code

$(function () {
    var rcb = $find("<%= myRadComboBox.ClientID%>");
    var items = rcb.get_items(); // <- error occurs here because rcb is null
}

The solution to it is actually quite simple. All we need to do is wrap above JS code inside a pageLoad() function, which is a default ASP.NET Ajax function. It is used to handle the load event of Application object in ASP.NET Ajax. (See this MSDN article, Ajax Client Life-Cycle Events, for more details)

Revised JS code

function pageLoad() {
    $(function () {
        var rcb = $find("<%= myRadComboBox.ClientID%>");
        var items = rcb.get_items(); // <- we can successfully get item collection as rcb is not null any more
    }
}

Apparently there are fundamental differences between jQuery $(function(){}) which is a shortcut for $(document).ready() and ASP.NET Ajax pageLoad(). More details are explained in this artile, $(document).ready() and pageLoad() are not the same.

How to asynchronously upload and save an image to the server (js/jquery + c#)

First, let’s take a quick look at some js/jquery code, and learn how to process image data URI, create an asynchronous request, and post data to the server.

Then following up, the back end c# code will be provided as an example, and we will learn how to handle the request and save image to a directory on the server.

client-side code sample (js/jquery)

//upload method using plain javascript
function upload(url) {
    var blob = getBlobData();
    var form = new FormData();
    var http = new XMLHttpRequest();
    form.append('uploadImage', blob);
    http.open("POST", url, true);
    http.send(form);
}

//upload method using jquery
function upload_jq(url) {
    var form = new FormData();
    var blob = getBlobData();
    form.append('uploadImage', blob);
    $.ajax({
        type: 'POST',
        url: url,
        data: form,
        processData: false,
        contentType: false,
        cache: false,
        success: function() {
            alert('upload completed...');
        },
        error: function(data) {
            alert('upload failed... ' + data);
        }
    });
}

// just a sample image data uri
var image_data_uri = "data:image/png;base64,iVBORw0KGgoAAAANSUhEUgAAAAUA
AAAFCAYAAACNbyblAAAAHElEQVQI12P4//8/w38GIAXDIBKE0DHxgljNBAAO
9TXL0Y4OHwAAAABJRU5ErkJggg==";

// helper functions
function b64ToUint6(nChr) {
    return nChr > 64 && nChr < 91 ? nChr - 65 : nChr > 96 && nChr < 123 ? nChr - 71 : nChr > 47 && nChr < 58 ? nChr + 4
: nChr === 43 ? 62 : nChr === 47 ? 63 : 0;
}

function base64DecToArr(sBase64, nBlocksSize) {
    var sB64Enc = sBase64.replace(/[^A-Za-z0-9\+\/]/g, ""), nInLen = sB64Enc.length,
    nOutLen = nBlocksSize ? Math.ceil((nInLen * 3 + 1 >> 2) / nBlocksSize) * nBlocksSize : nInLen * 3 + 1 >> 2,
    taBytes = new Uint8Array(nOutLen);
    for (var nMod3, nMod4, nUint24 = 0, nOutIdx = 0, nInIdx = 0; nInIdx < nInLen; nInIdx++) {
        nMod4 = nInIdx & 3;
        nUint24 |= this.b64ToUint6(sB64Enc.charCodeAt(nInIdx)) << 18 - 6 * nMod4;
        if (nMod4 === 3 || nInLen - nInIdx === 1) {
            for (nMod3 = 0; nMod3 < 3 && nOutIdx < nOutLen; nMod3++, nOutIdx++) { taBytes[nOutIdx] = nUint24 >>> (16 >>> nMod3 & 24) & 255;
            }
        nUint24 = 0;
        }
    }
    return taBytes;
}

function getImageFormat() {
    var image_fmt = '';
    if (image_data_uri.match(/^data\:image\/(\w+)/)) {
        image_fmt = RegExp.$1;
        } else {
            throw "invalid image data uri";
        }
    return image_fmt;
}

function getBlobData() {
    var image_fmt = getImageFormat();
    var raw_image_data = image_data_uri.replace(/^data\:image\/\w+\;base64\,/, '');
    return new Blob([base64DecToArr(raw_image_data)], { type: 'image/' + image_fmt });
}

add buttons to call the js/jquery function

<input id="btnUploadJs" type="button" value="Upload (js)" />
<input id="btnUploadJQuery" type="button" value="Upload (jquery)" />

server-side code sample (c#)

protected void Page_Load(object sender, EventArgs e)
{
    if (!IsPostBack)
    {
        var file = Request.Files["uploadImage"];
        if (file.InputStream != null && file.InputStream.Length > 0)
        {
            var fileName = string.Format("{0}_{1}.jpg", "image_uploaded", DateTime.Now.ToString("yyyymmdd_hhmmss"));
            var filePath = string.Format("~/Upload/{0}", fileName);
            file.SaveAs(Server.MapPath(filePath));
        }
    }
}

OK. Now we have a way to process the image data URI, asynchronously upload it and save a jpg image copy on the server every time the upload button is clicked.

Periodically remove old files using ForFiles command line tool and Task Scheduler

ForFiles is a pretty handy command line tool for handling batch-processing files, especially when it comes to deleting/renaming files.

Here we are going to see an example on how to use ForFiles command line and create a task for Task Scheduler in order to periodically to delete log files that are older than 7 days.

The command line we will be entering is shown below.

C:\Windows\System32\forfiles.exe -p "C:\MyDirectory" /s /m *.log /d -7 /c "cmd /c del @path"

ForFiles accepts following parameters and in this example, we are using a combination of most of these parameters.

Parameter Description
/p <Path> Specifies the path from which to start the search. By default, searching starts in the current working directory.
/m <SearchMask> Searches files according to the specified search mask. The default search mask is *.*.
/s Instructs the forfiles command to search into subdirectories recursively.
/c “<Command>” Runs the specified command on each file. Command strings should be enclosed in quotation marks. The default command is “cmd /c echo @file”.
/d [{+|-}][{<Date>|<Days>}] Selects files with a last modified date within the specified time frame.

  • Selects files with a last modified date later than or equal to (+) or earlier than or equal to () the specified date, where Date is in the format MM/DD/YYYY.
  • Selects files with a last modified date later than or equal to (+) the current date plus the number of days specified, or earlier than or equal to () the current date minus the number of days specified.
  • Valid values for Days include any number in the range 0–32,768. If no sign is specified, + is used by default.
/? Displays help at the command prompt.

For more details, please refer to this MSDN article.

OK. Now let’s put it together in the Task Scheduler.

  1. Open a command prompt and type Taskschd.msc
  2. Right click Task Scheduler (Local) and select Create Basic Task…
  3. Fill in the name and description for the task, then select and set up an appropriate occurrence for Trigger
  4. Choose Start a program as the option for Action
  5. Enter C:\Windows\System32\forfiles.exe in the Program/script field
  6. Enter -p "C:\MyDirectory" /s /m *.log /d -7 /c "cmd /c del @path" in the Add arguments (optional) field
  7. Review and save the changes

That’s it. Based on what occurrence was set up in the Task Trigger, the old log files will be deleted periodically with ease.

Display multiple-line text in title attribute

When you need to display some relatively lengthy text in the tooltip, it’d be better to break text into multiple lines for better readability.

We know that in JavaScript, we can use “\n\r” to break the line in the display message, e.g. in a popup alert box. But this won’t work if we need to break lines in the tooltip.

So the trick for breaking up the line is to add a code, &#_013; (without the underscore) It basically indicates that the new line will start right after this character.

For example (without the underscore)

<label title="Line1&#_013;Line2"></label>

This trick also works for ToolTip property for ASP.NET web controls.

For example (without the underscore)

<asp:Label runat="server" ID="Label1" Text="Label1" ToolTip="Line1&#_013;Line2"></asp:Label>


Create PowerShell Functions

When we have a block of code that will be used over and over again, we should consider putting it into a function. That way, the code block can be reused and managed much more easily than writing the same piece of code multiple times in the script.

Using functions also helps improve code readability and maintainability. With a meaningful function name, we can quickly identify the code and understand what it is supposed to do. If there is a problem in the code, we only have to fix it in one place.

So let’s take a look at some examples of PS Function.
## Example 1
function ShowMyProcess
{
Get-Process
}
ShowMyProcess

Above is a very basic function that shows information about the processes running on my computer. It doesn’t require any parameters.
## Examples 2
function ShowMyFileList ($filepath, [bool]$isRecur)
{
if($isRecur)
{
Get-ChildItem -Path $filepath -Recurse
}
else
{
Get-ChildItem -Path $filepath
}
}
ShowMyFileList "C:\" $true

The second example is a little bit more complex than the first one. The function requires a couple of parameters and it returns results based on the input values. So in the above case, we are expecting the function to list all the files under C drive, in a recursive manner.

Scientists studying starlight can tell you: Our universe is going dark

When our universe dies, a new one will be born, and the life-death cycle continues for aeons.
There’s really nothing we can do to stop this process and it’s no use to worry about the inevitable demise of our universe.
Life is short, as we all know. So enjoy present moment and live a happy life.

Upgrade from Win 8.1 to Win 10

Windows 10 is out. How exciting! But sometimes things don’t come out as planned. Hiccups do happen.

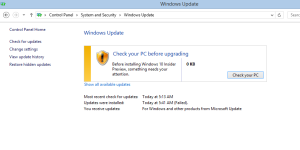
While I was eagerly waiting for the upgrade to happen, Windows Update seemed to be having some issues. I got a whole bunch of following errors showing in Windows Update history.

Win10 update failure

Apparently the system was trying to apply the update, but it kept failing. Rechecking the update and doing system restart didn’t make any difference.

According to Microsoft community forums, this error was due to the background Windows 10 download was incomplete or/and corrupted. So I went to try following suggested steps:

  1. Go into “C:\Windows\SoftwareDistribution\Download” and delete everything in that folder.
  2. Now, run the command prompt as an administrator. Type in “wuauclt.exe /updatenow”.
  3. Go to your Control Panel > Windows Update and your Windows 10 should start re-downloading from scratch, hopefully without flaws this time.

Still that didn’t help either. And here came a new error in Windows Update.

error2

I wonder if the installation packages were delivered through waves, and I was very likely to receive only partial packages. So one of the solutions would be simply to wait. Once the full packages delivered, the system would get notified and installation should start automatically.

But I just felt like I could do something to expedite the process and upgrade it now.  Here’re the steps:

  • Download Windows 10 Media Creation Tool (Make sure to pick the right bit version)
  • Run the tool, and it should start checking PC automatically and downloading Win 10 installation packages.
  • The tool provides 2 options, upgrade and create installation media. In my case, I chose upgrade option.
  • “Something happened” error might occur during the process, if so, should change the system locale to EN-US and restart. That should fix this error screen.
  • The rest of process is pretty straightforward. The tool just does its own thing and pretty much requires no human interventions.
  • After 1-2 hours, the installation should complete.

OK. Enjoy Win 10.

Extract txt files from a zip archive using PowerShell

Scenario:

You’d like to extract all txt files from a zip archive, and then remove the archive file if successful,

PS Script:

& "C:/Program Files/WinRAR/WinRar.exe" x -r ".zip" ".txt" | Write-Output
if($?)
{
Remove-Item "*.zip"
}

Explanations:

& is the call operator, also known as invocation operator, which runs an external executable. In above example, it runs an WinRaR command line, which is installed under “C:\Program Files\” directory.

The following X -r are the command arguments for WinRaR command line. X means it’s an extraction operation, and -r is a switch that indicates recursion. Please refer to this online manual for more WinRaR commands and switches.

$? is a special token that returns boolean (True or False) value, indicating whether or not previous command ended with an error. So in our case, it tells the if conditional statement whether calling Remove-Item cmdlet is needed or not.

Recommended Resource

PowerShell: Running Executables

PowerShell Special Characters And Tokens

PowerShell and external commands done right

Watch: What our solar system would look like when traveling at the speed of light

It just shows how incredibly big the universe really is!!
Also attached is a link to a very fancy website that gives us a real perspective of our solar system. Worth checking it out and please be patient. 🙂
http://joshworth.com/dev/pixelspace/pixelspace_solarsystem.html


Bulk delete specific files using PowerShell

Scenario:

You’d like to remove a bunch of specific files that contain prefix of _del from a given directory “C:\OldFiles“.

PS Script:

Get-ChildItem -Path "C:\OldFiles" | Where-Object {$_.Name -like "*_del.*"} | Remove-Item -Verbose

Explanations:

Above script can be divided into 4 parts,

  1. Get-ChildItem -Path “C:\OldFiles”
  2. Vertical Bar (|) or also known as, Pipeline
  3. Where-Object {$_.Name -like “*_del.*”}
  4. Remove-Item -Verbose

Get-ChildItem is one of the very basic PS cmdlets that gets the items and child items in one or more specified locations. In above scenario, we have specified the location to be C:\OldFiles using -Path parameter.

Pipeline (|) is used between commands to create the pipeline. We work from left to right down the pipeline. The output of one command effectively becomes the input of the next command.

Where-Object is another PS cmdlet that is being used very often. It provides a way to filter data returned by other cmdlets.

Things here to be aware of:

The where clause is enclosed within curly braces; in addition, the $_ notation is used to represent the default object (that is, the object being transferred across the pipeline). Last, but surely not least, notice the comparison operator being used to indicate greater than: it’s -gt as opposed to >. Windows PowerShell does not use the standard arithmetic comparison operators; instead, it uses operators such as these:

  • -lt — Less than
  • -le — Less than or equal to
  • -gt — Greater than
  • -ge — Greater than or equal to
  • -eq — Equal to
  • -ne — Not equal to
  • -like – Like; uses wildcards for pattern matching

Remove-Item is a cmdlet that deletes the specified items. In normal case, -Path parameter should be expected. However, in the example above, the files that will be removed are sent down through the pipeline from Get-ChildItem and Where-Object cmdlets. In other words, only those specific files will be removed by Remove-Item cmdlet.

-Verbose is a parameter that allows to output some extra info about the cmdlet operation. For example, the message “VERBOSE: Performing the operation “Remove File” on target “C:\OldFiles\1_del.txt”.” will be displayed in the console window.


Recommended resources:

Windows PowerShell – Conditional Operators

Windows PowerShell – Pipeline Symbol (|) or (¦)